
Viz World Classic User Guide
Version 23.0 | Published December 12, 2023 ©
Controlling Layer Compositing
By default, layers are simply composited one over the other using only their own alpha channel to determine which parts are visible in the finished composite, and which are not.
More sophisticated levels of compositing can be achieved using the blend mode, opacity, and composite mask.
To Specify the Compositing Options
Each layer provides compositing options to allow you to specify how the layer is combined with the other layers in the project, and its opacity.

-
Select the layer in the Layers list, and click the Properties tab to display the Properties panel for the layer.
-
Click the right arrow button to the left of the Compositing Options heading to display the compositing options for the layer:
Blend Mode specifies how the layer is combined with the other layers, and can be one of:
Normal, Add, Subtract, Difference, Multiply, Darken Only, Burn, Color Burn, Screen, Lighten Only, Dodge, Color Dodge, Hue, Saturation, Value, Color, Overlay, Soft Light, Hard Light, Pin Light, Exclusion, or Negation.
The Opacity determines the layer opacity, and can be animated.
Use Paint Mask as a Key (image layers only) and Obey Composite Mask are equivalent to the same options in the Composite Mask dialog box; see below.
To Specify the Composite Mask Options
The composite mask allows you to make one layer appear to pass in front of some parts of a layer below, but behind other parts.
For example, if you want to insert a character into a forest scene, you can make it appear behind some trees, but in front of others.
The composite mask is generated layer by layer as a composite image is built up, and can be used to protect parts of a layer from change by layers above in much the same way as the paint mask is used to protect images from paint operations.
For each layer, you can specify:
-
Whether the layer’s paint mask is used as a key for the layer.
-
Whether the layer makes any changes to the composite mask which is passed on for use by layers above.
-
Whether the layer obeys the composite mask (whether the composite mask is used to protect the layers below from change by this layer).
You set options for each layer using the Composite Mask dialog box which is displayed by clicking the mask icon to the right of the layer name in the Layers list. This allows you to set the compositing options for the layer.
To Use the Layer’s Paint Mask as a Key
This provides a quick way of cutting out a feature in an image.
-
Use the paint tools to create the mask:

-
In the When Compositing this Layer section select Use the paint mask as a key. The layer’s paint mask is added to the alpha channel, and used to key the image:

To Specify whether the Current Layer Obeys the Composite Mask
In the When Compositing this Layer section: Select Obey the Composite Mask. To use the composite mask at least one layer should have this option selected. This option is irrelevant for the lowest layer in the Layers list.
To Specify whether the Current Layer Affects the Composite Mask
In the After Compositing this Layer section: Select Create new Composite mask to update the composite mask with the new composite mask.
To use the composite mask at least one layer should have this option selected. The default action is for the layer’s paint mask to replace the existing composite mask, making those elements of the layer that are covered by the mask appear in front of layers above that obey the mask.
Alternatively, you can specify that the paint mask is combined with the composite mask as described below. This option is irrelevant for the highest layer in the Layers list.
To Specify How the Current Layer Affects the Composite Mask
Click the right arrow button to the left of the Advanced Options to show the advanced options.
Once a layer has been composited, you can use either its alpha channel or, in the case of an image or movie layer, its paint mask to modify the composite mask. You can also choose to invert the mask or alpha channel before use:
In the Use this layer’s... section:
-
Select Paint Mask or Alpha channel.
-
Select Inverted to invert the paint mask or alpha channel before using it.
The composite mask can also be affected in different ways. You can either replace the existing composite mask, or combine the composite mask with the mask or alpha channel of the current layer.
In the To... section:
-
Select Replace the existing mask to create a new composite mask which is a copy or inverted copy of the layer’s paint mask or alpha channel.
-
Select Add to the existing mask to add the layer’s paint mask to the existing composite mask.
-
Select Intersect with the existing mask to create a new composite mask which is an intersection of the existing mask and the layer’s paint mask or alpha channel If you do not select Create new Composite mask, the existing mask is left unchanged and may be used to protect the composite image from change by any number of layers above.
To Make an Image Go behind Selected Features in a Scene
The following example illustrates one of the most powerful uses of layer compositing to control how one image interacts with components of another image. In this example, we use composite masks to make a butterfly go behind the front most poppy in an image of several poppies.
In this example, both the images have alpha channels, to allow a background image to show through. The first step is to create a mask defining the foreground image; in this case the front most poppy:
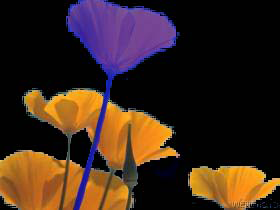
This can be done using the mask extract tools on the Mask panel, followed by painting on the mask using the brushes on the Brushes panel.
-
Load the butterfly image, and create a mask for the butterfly.
-
Position the butterfly layer above the poppies image.
-
Load the clouds image, and move it to the bottom of the Layers list. The composite image reflects the order of the individual images in the Layers list:
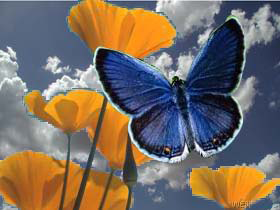
You can view the components of the project in the Content Manager:
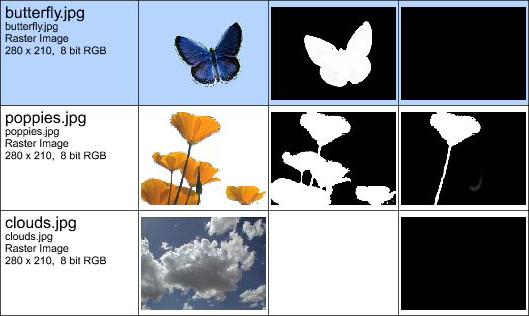
-
Click the mask icon, to the right of the layer name on the poppies image layer in the Layers list, and select Create new Composite mask:
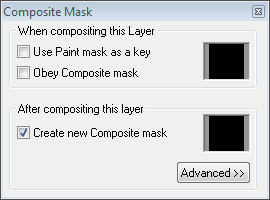
-
Likewise, click the mask icon for the butterfly layer and select Obey the Composite Mask:
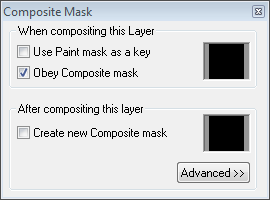
The composite mask is a copy of the mask on the poppies layer. This can then be used to protect the front most poppy from change by layers above. Since the butterfly is composited obeying the composite mask, the effect is that the area of the butterfly corresponding to the front most poppy is masked out, so the butterfly appears to go behind the poppy:
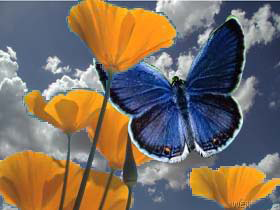
The Composite Mask options can be animated, so a butterfly could be made to fly behind the poppy in one part of the movie, and in front of the poppy in another part of the movie.