Viz Pilot User Guide
Version 8.2 | Published July 23, 2018 ©
Viz Engine Preview in Director
Local preview uses a local Viz Engine, while remote preview uses a remote Viz Engine.
-
Local Preview in Director
-
Remote Preview in Director
See Also
Local Preview in Director

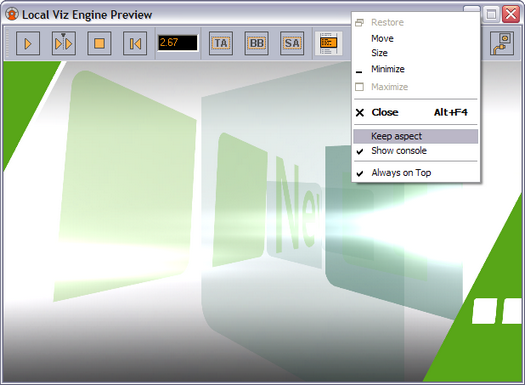
Local Preview means that a Viz Engine is installed locally on the Director machine for preview purposes. It also requires the Viz Engine Preview Plugin which is not enabled by default, but can be enabled/disabled in the Viz Pilot Configuration Tool.
See Configuring Local Preview.
The interface is the same as used in Viz Pilot News, see Local Preview in the Newsroom.
To see a local preview
-
Set a local Viz Engine (i.e. localhost) as the preview renderer in the Profile Configuration.
-
From the main menu select Viz Engine > Local Preview, or press CTRL+P.
-
Open a playlist.
-
Right-click the playlist and check the Auto preview option (which allows preview to be sent as soon as an item in the list is selected).
-
Click a data element and it will be sent to the preview window.
Remote Preview in Director

Remote Preview means that a Viz Engine is installed remotely on another machine for preview purposes.
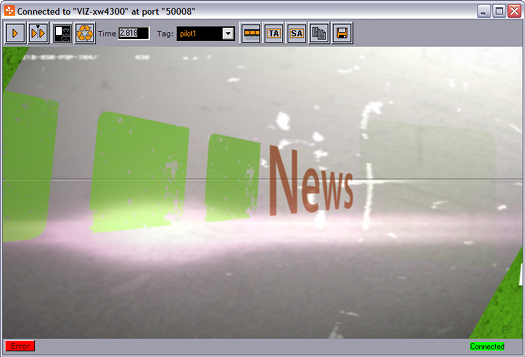
This option allows you to see a remote “snapshot” preview (still or animated) of a template or data element. Animated means that a series of frames are fetched from the preview renderer on-the-fly; hence, it is not a real-time rendering. However, if you have a reference monitor connected to your Viz Engine’s DVI/VGA output you may use the preview window’s control buttons to play or scrub the graphics in real-time.
To configure Remote Preview, see Configuring Remote Preview in Director.
This section contains the following topics:
-
Properties and Parameters
-
To see a remote snapshot preview
Properties and Parameters
-
Start: If the graphic has two or more tags on its timeline, this asks Viz Engine for a snapshot of the first frame or the first tag on the main (default) director. If the scene, or foreground scene in transition logic terms, has a pilot1 tag it will by default jump to that tag on the director and show that frame.
-
Continue: If the graphic has two or more tags on its timeline, this asks Viz Engine for a snapshot of the remaining tags on the default director.
-
Key: Shows the key signal of the graphics.
-
Time field: Shows the current timeframe for the scene. Allows the user to scrub the scene manually.
-
Tag field: Shows the scene’s director tags on the Default director. These tags are used for previewing the scene, and are not actual stop points. Proper stop points enable the use of Continue to trigger the animation and should not be used for creating tags for preview purposes.
-
Animate: Asks Viz Engine for a series of snapshots according to the Remote Preview Preferences configuration under Director Preferences this in turn is played out in sequence in the preview window in order to animate the scene.
-
Title Area: Shows the boundaries of the defined title area (green rectangle).
-
Safe Area: Shows the boundaries of the defined safe area (purple rectangle).
-
Copy: Copies the current snapshot onto the Windows clipboard.
-
Save: Saves the snapshot as a PNG file.
-
Error: Shows the error log for the current session.
-
Connection: Shows the current Viz Engine connection status.
To see a remote snapshot preview
-
Right-click in the playlist and from the context menu select Auto Preview
-
From the main menu select Viz Engine > Remote Preview, or press CTRL+P
-
Open an item in the playlist
-
This will send a preview to Viz asking for the first frame of the scene or the frame of the first preview tag
-