Viz Vectar Plus User Guide
Version 1.3 | Published November 18, 2022 ©
The Home Page
About 30 seconds after you start-up Viz Vectar Plus, the Home page appears. The Home page is where you create and manage your sessions.

For most operations, you choose an operation from the buttons on the left.
Session Operations
New Session
Starting a fresh live production requires a minimal setup.
To create a new session
-
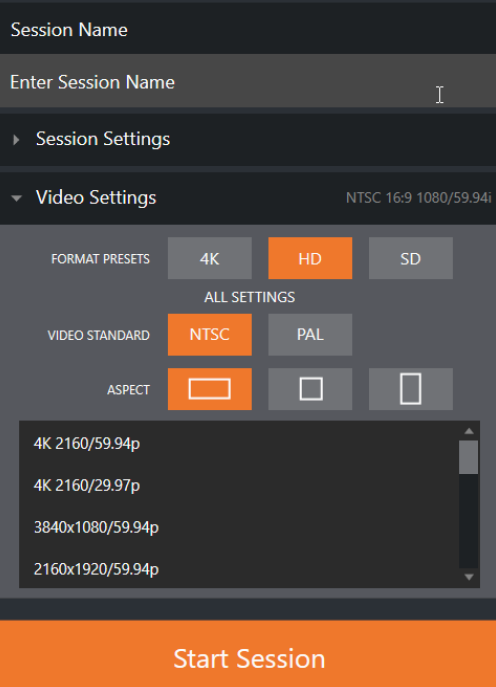
Clicking New Sessions populates the pane on the right with input menus Session Name and Settings, and Video Settings.

-
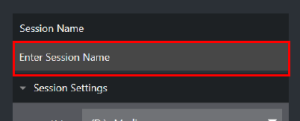
Session Name: A Name box for your session appears. Click in this field to modify the default name (the current date).
-
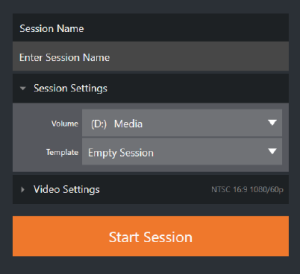
Session Settings: Storage and preset configuration settings. You can usually skip this setting to get started.
-
Volume: Displays the primary hard drive assigned for the session. Media and other content created during the session will be stored here by default.
Note: When using internal IsoCorder™ capture modules to record multiple sources, you may assign more than one volume for capture tasks. Sessions also automatically manage clips and other media, providing easy access to them for live use.
Detected storage volumes are listed in a drop-down menu when you click Volume.
You can select any volume shown as the session drive, though external drives are not recommended for active use as session drives. -
Template: Lists all sessions currently available on the system. If you select one of these existing sessions, all session characteristics are used as a basis for your new session.
-
-
Video Settings: Set the standards for your production:
-
VIDEO STANDARD: Define your local video standard. NTSC or PAL video according to your locale.
-
ASPECT: Aspect ratio, landscape, square or vertical aspect for the session.
-
FORMAT PRESETS: Select a video format, and then from the listing (for example 1080/59.94p).
-
-
To begin your production, click Start Session.
Opening a Session
If there are previously defined sessions on the system, clicking Open Session lists all sessions stored on the currently mounted storage media.
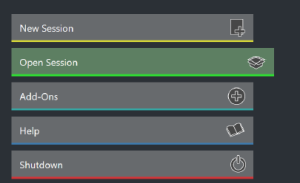
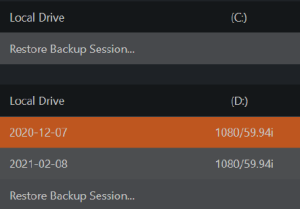
Available sessions are grouped under the names of the storage volume. The listing shows the session name and format for each session, on each drive.
To open a session
-
Click or tap a name in the Session list to launch that session and display the Sessions screen.
Session Name Context Commands
-
Right-clicking a session name opens a context menu:
-
Rename: Give the session a more meaningful name.
-
Delete: Beware! Cannot be undone.
All content stored in the named session’s folders are deleted, including imported clips, images and titles, any clips captured to the default session folders.
-
Note: Content that is not local to the session but which was used in it is not deleted. For example, you may have added still images to your playlist directly from a USB thumb-drive, without importing the files into the session. These external files are not deleted.
Other Menu Operations
Title Bar Tools
Once a session is open, these tools are always available on the top of the screen.
Eject

The Eject button at the top-right corner safely disconnects external drives. (Drives can also be ejected from the Live Desktop during a production session).
Note: Media configured as Read-only is not shown on New or Open (session) menus, since they cannot be used for session. Read-only media can be used for importing media to a session.
NDI KVM

The NDI KVM (keyboard, video and mouse) menu leverages the NDI® protocol to provide extended KVM functionality, giving you full control of your system from anywhere on the network where a Windows version of NDI Studio Monitor is running.
-
To enable this feature, see section NDI KVM.
Start Menu Tools
Shutdown
This selection provides Restart, Shutdown, and Administrator Mode operations.
Administrator Mode
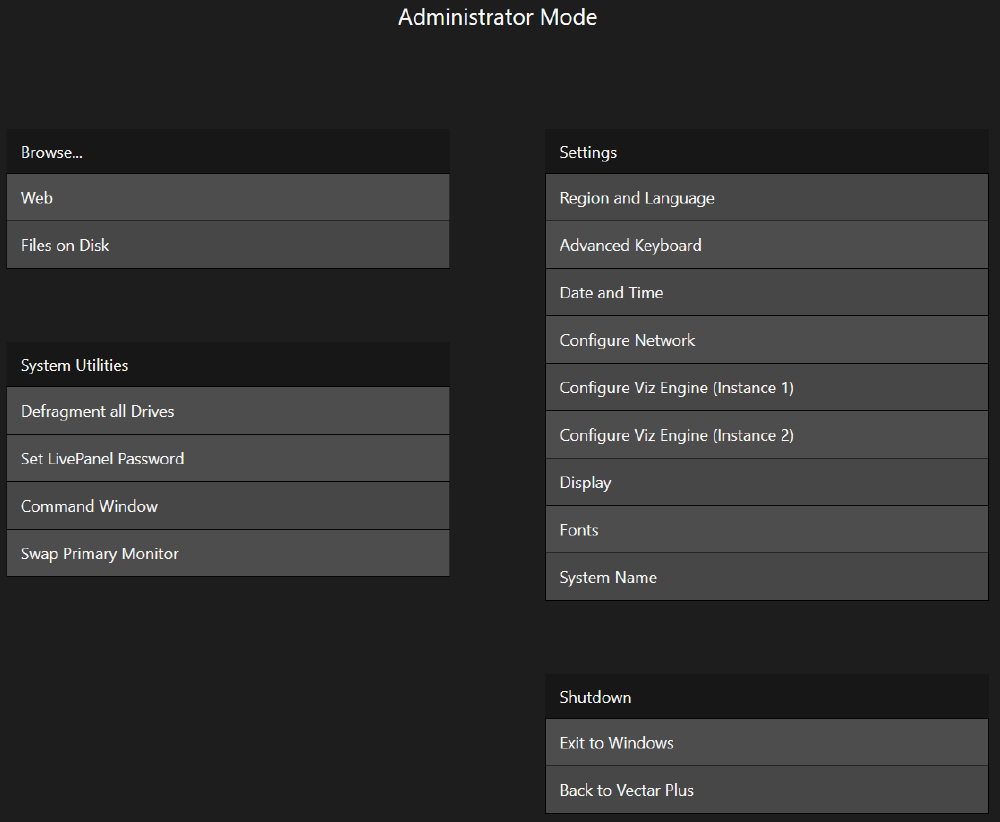
Selecting Administrator Mode from the Shutdown exits the live production environment, and opens a new screen with system maintenance and management features and settings.
Browse
-
Web: Opens the default system Internet browser.
-
Files on Disk: Opens a Windows file Explorer.
System Utilities
-
Defragment all Drives: Over the course of lengthy use, data on hard drives devoted to audio and video storage tends to become fragmented, which degrades playback performance. Defragmenting corrects this condition.
Tip: Defragmentation can sometimes take considerable time, so it’s not something you want to begin just before an important event.
-
Set LivePanel Password: Configures the password for access to the web pages and network control features provided by the unit.
-
Command Window: Opens a Windows system command session.
-
Swap Primary Monitor: Shows the Live Desktop on the monitor designated as primary.
Settings
-
Regions and Language: Opens the Windows Region menu.
-
Advanced Keyboard: Opens the Windows Language menu.
-
Date and Time: Opens the Windows Date and Time menu.
-
Configure Network: Opens the Windows Network and Sharing menu.
-
When Viz Vectar Plus is Installed with an embedded Viz Engine
-
Configure Viz Engine (Instance 1): Launches the Viz Configuration UI.
-
Configure Viz Engine (Instance 2): Launches the Viz Configuration UI.
Note: If using both Viz Engines, configure them separately before using.
-
-
Display: Opens the Windows Display settings panel (useful for configuring multiple monitors).
-
Fonts: Opens the Windows Font management menu. You can add client-specific fonts (for example, used in Title pages).
-
System Name: Opens the Computer Name tab of the Windows System Properties menu. Here you can add/modify the name by which your system is identified on the network. Useful to modify a default name when more than one unit is on the same network.
(Modify the current name with the Change button).
Shutdown
-
Exit to Windows: Leave Administrator Mode and display the standard Windows desktop.
-
Back to Vectar Plus: Exits Administrator Mode, and return to the Launch screen.
Help

-
Help displays links to a user guide, software details and online resources.
Add-ons
-
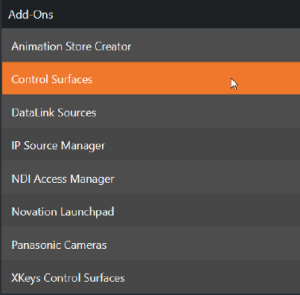
The Add-Ons menu provides access to additional software tools that extend the features of your Live Production.
